Skip to content
AdiLock User Manual
The AdiLock User Manual provides a comprehensive guide to installing, configuring, and using AdiLock Enterprise Pro Edition. This web-based manual presents the product documentation in a structured and easy-to-navigate format, allowing users to quickly find information about features, licensing, protection settings, and workflows. With organized sections, and step-by-step instructions, it helps developers and software vendors efficiently implement AdiLock to protect their applications and manage software licensing.
Introduction
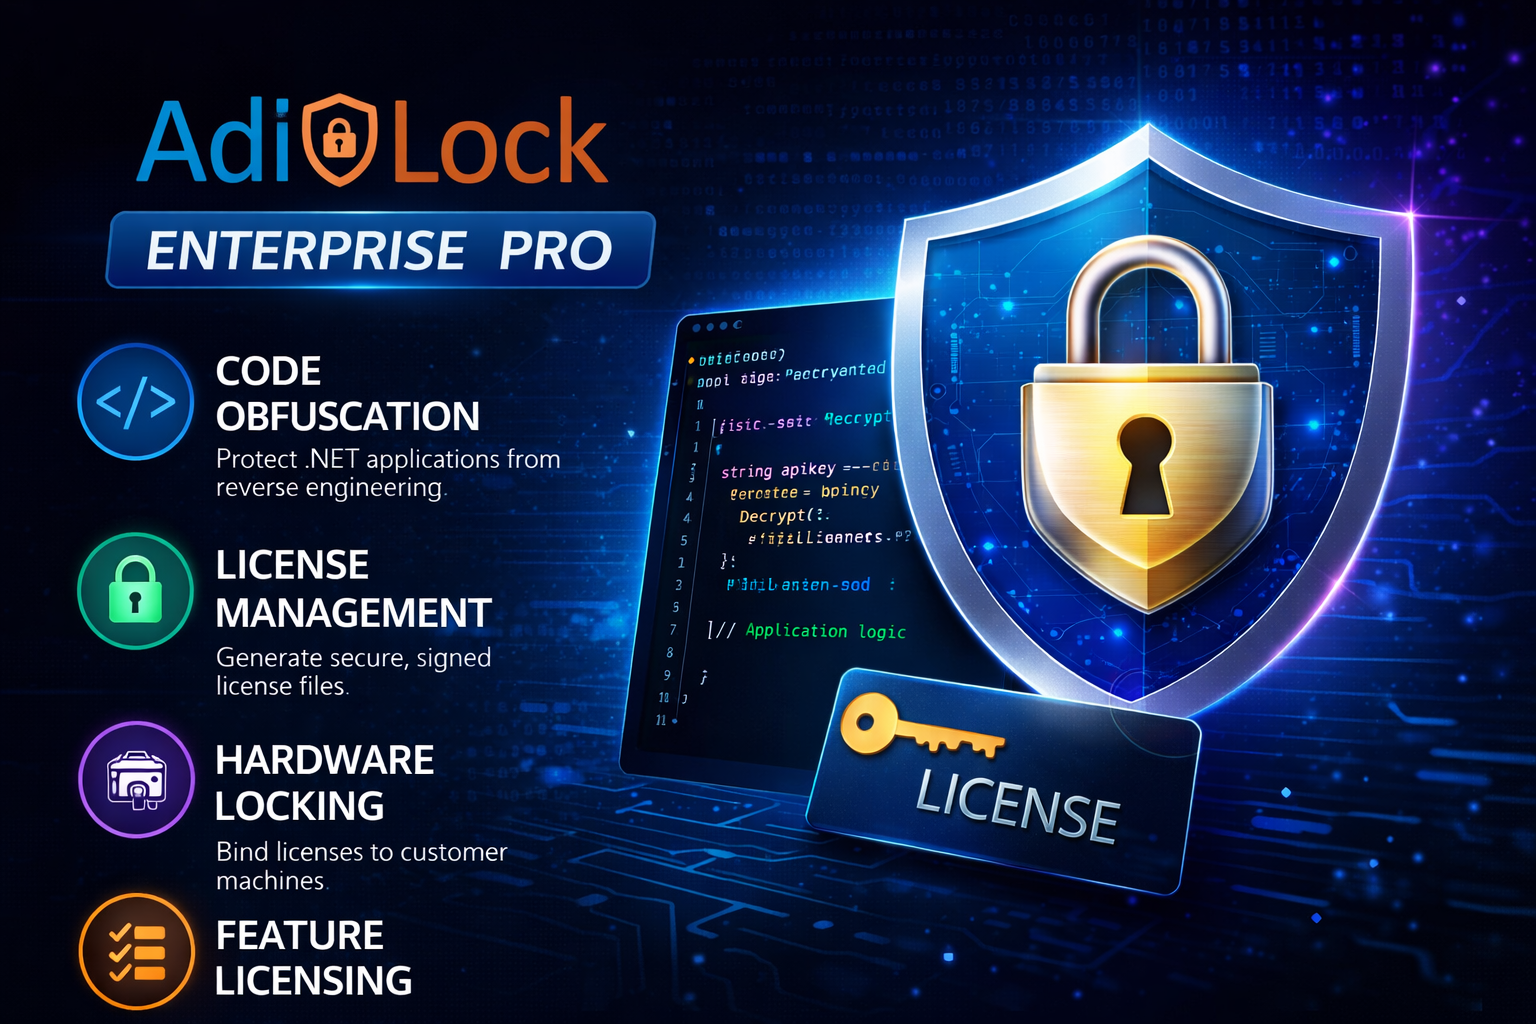
AdiLock is a professional licensing and obfuscation platform for .NET developers and software vendors. It helps protect assemblies from reverse engineering, control who can run the software, and manage license entitlements from one interface.
What AdiLock Does
- Code Obfuscation: Hardens assemblies against decompilation, tampering, and reverse engineering.
- License Management: Generates cryptographically signed license files tied to hardware, time, or features.
Who This Manual Is For
Software developers and product managers distributing .NET applications commercially. No deep cryptography or compiler knowledge is required.
Getting Started
Create a project first. A project stores protection settings, assembly paths, and feature definitions in one reusable file.
The Dashboard opens automatically.
Use + New Project from the sidebar or File > New Project.
Choose your .NET .exe or .dll and define an output directory.
Your project name appears in the header and settings are available for future use.
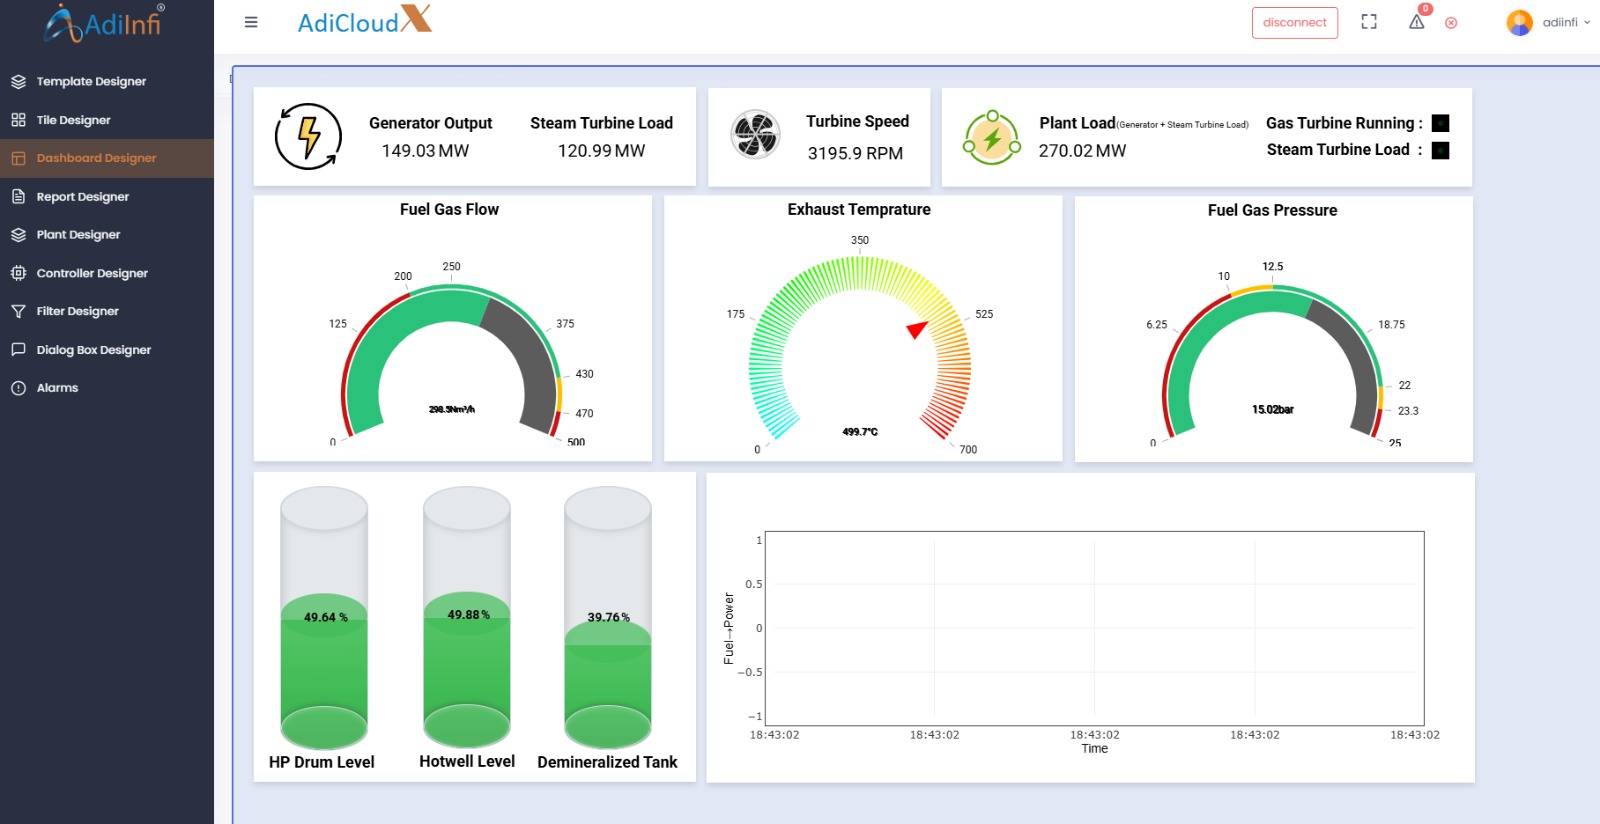
Dashboard
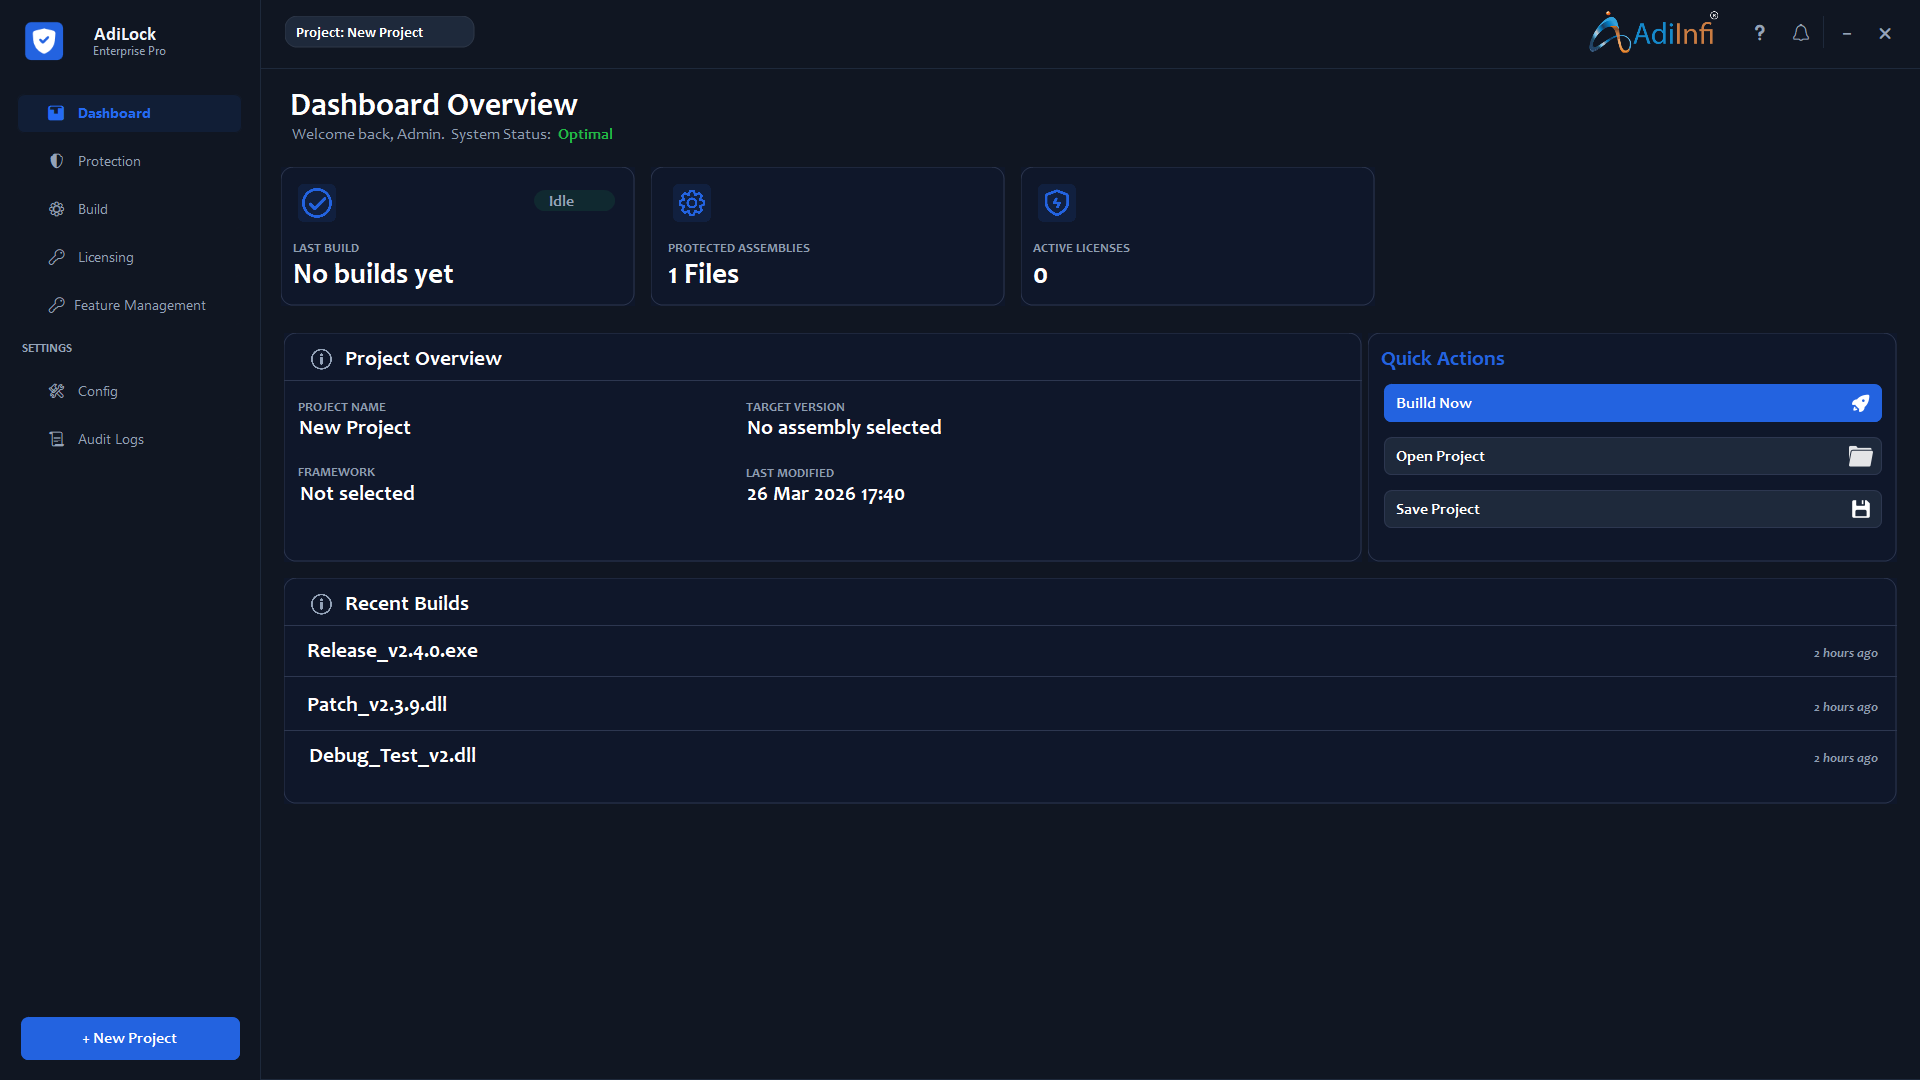
The Dashboard provides a quick status overview of the active project and shortcuts for the most common tasks.
Last Build
Shows whether the most recent protection run is idle, in progress, or completed.
Protected Assemblies
Displays the number of configured assemblies in the current project.
Active Licenses
Shows how many license files have been generated for the project.
Quick Actions
Use Build Now, Open Project, and Save Project for fast access.
Protection Settings
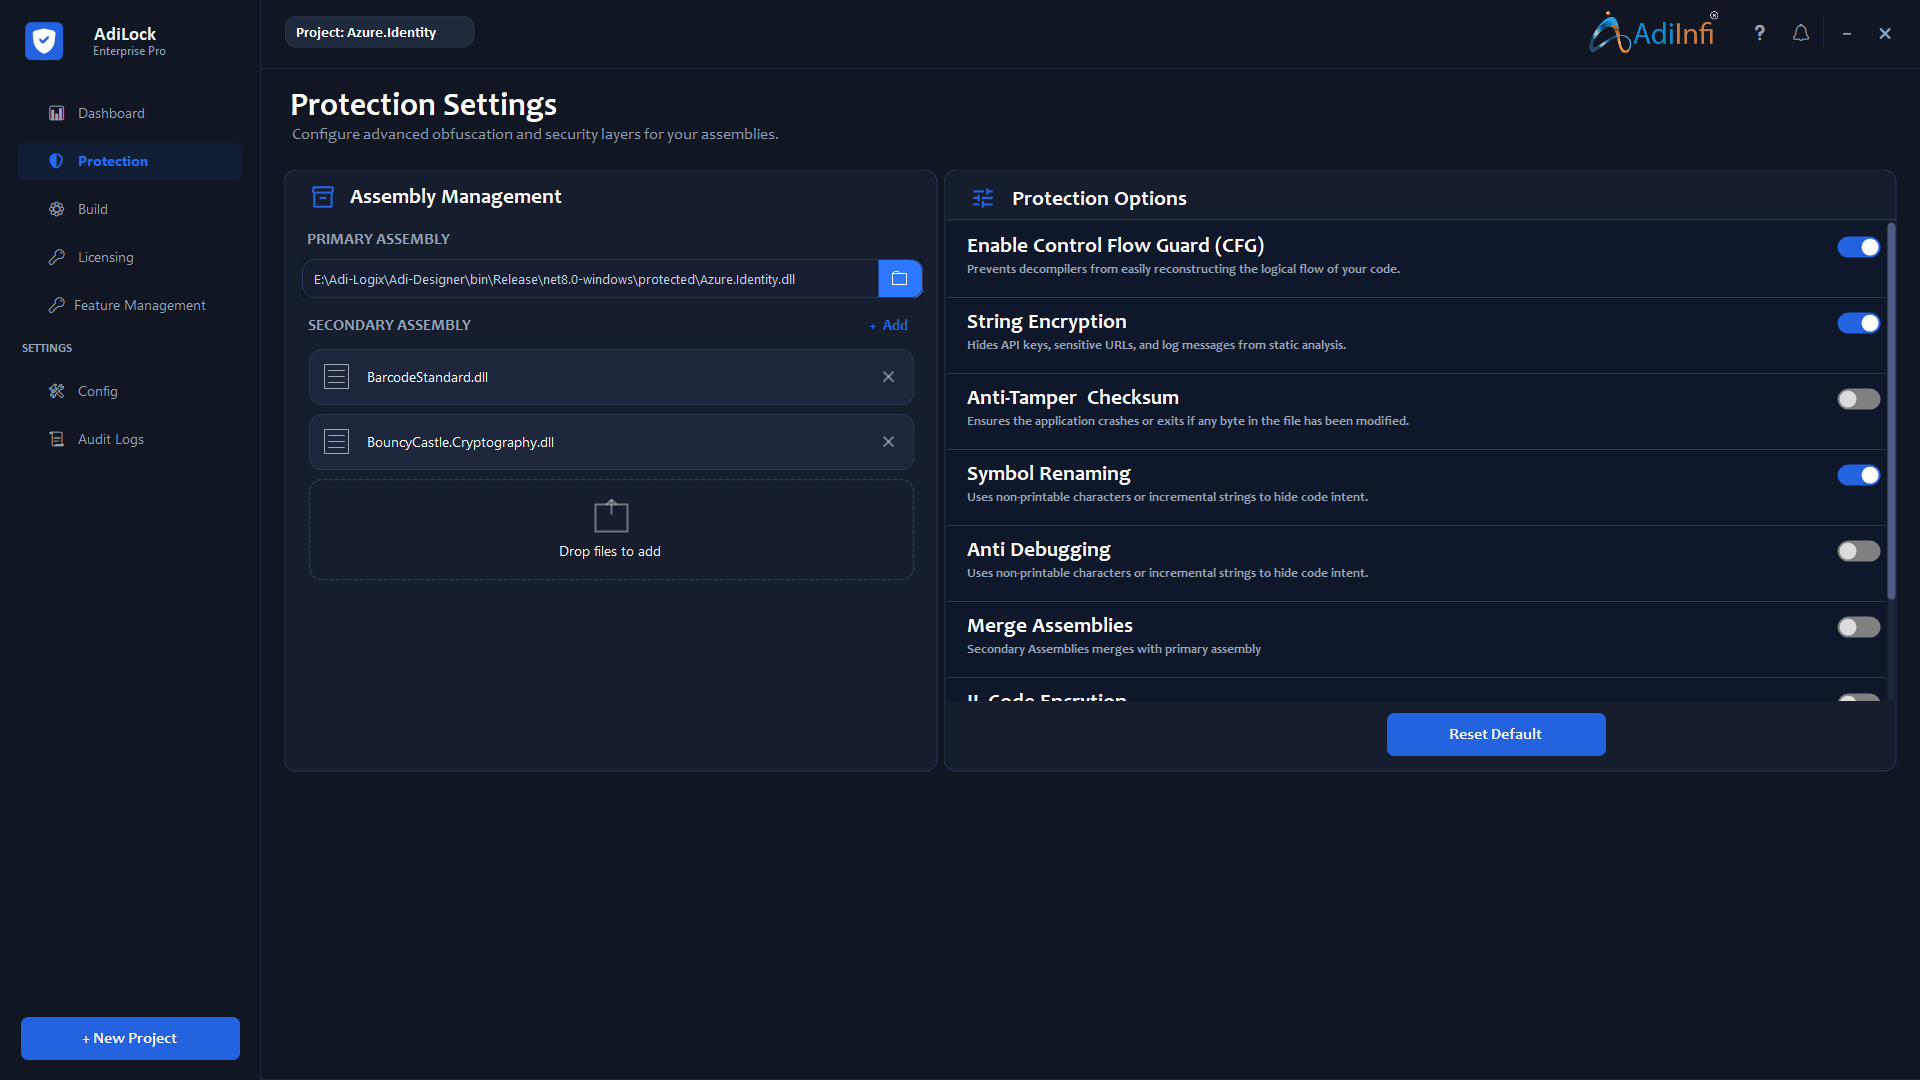
Configure the security layers that will be applied during the build. Each setting can be toggled on or off.
Assembly Management
- Primary Assembly: The main required .exe or .dll.
- Secondary Assemblies: Optional dependent DLLs you also own.
- Merge Assemblies: Combine secondary assemblies into one output file.
Recommended Baseline
Control Flow Guard, String Encryption, and Symbol Renaming create a strong default baseline for most commercial applications.
| Protection Option | What It Does | Default |
|---|---|---|
| Control Flow Guard | Restructures method logic to make source reconstruction harder. | Enabled |
| String Encryption | Encrypts hardcoded strings like URLs, API keys, and messages. | Enabled |
| Anti-Tamper Checksum | Adds self-verification and blocks execution when the file is modified. | Optional |
| Symbol Renaming | Replaces meaningful class, field, and method names with meaningless symbols. | Enabled |
| Anti Debugging | Detects debugger attachment and reacts based on configured behavior. | Optional |
| Merge Assemblies | Combines secondary assemblies into the primary output. | Optional |
| IL Code Encryption | Encrypts method bodies at the IL level and decrypts them only at runtime. | Optional |
Build
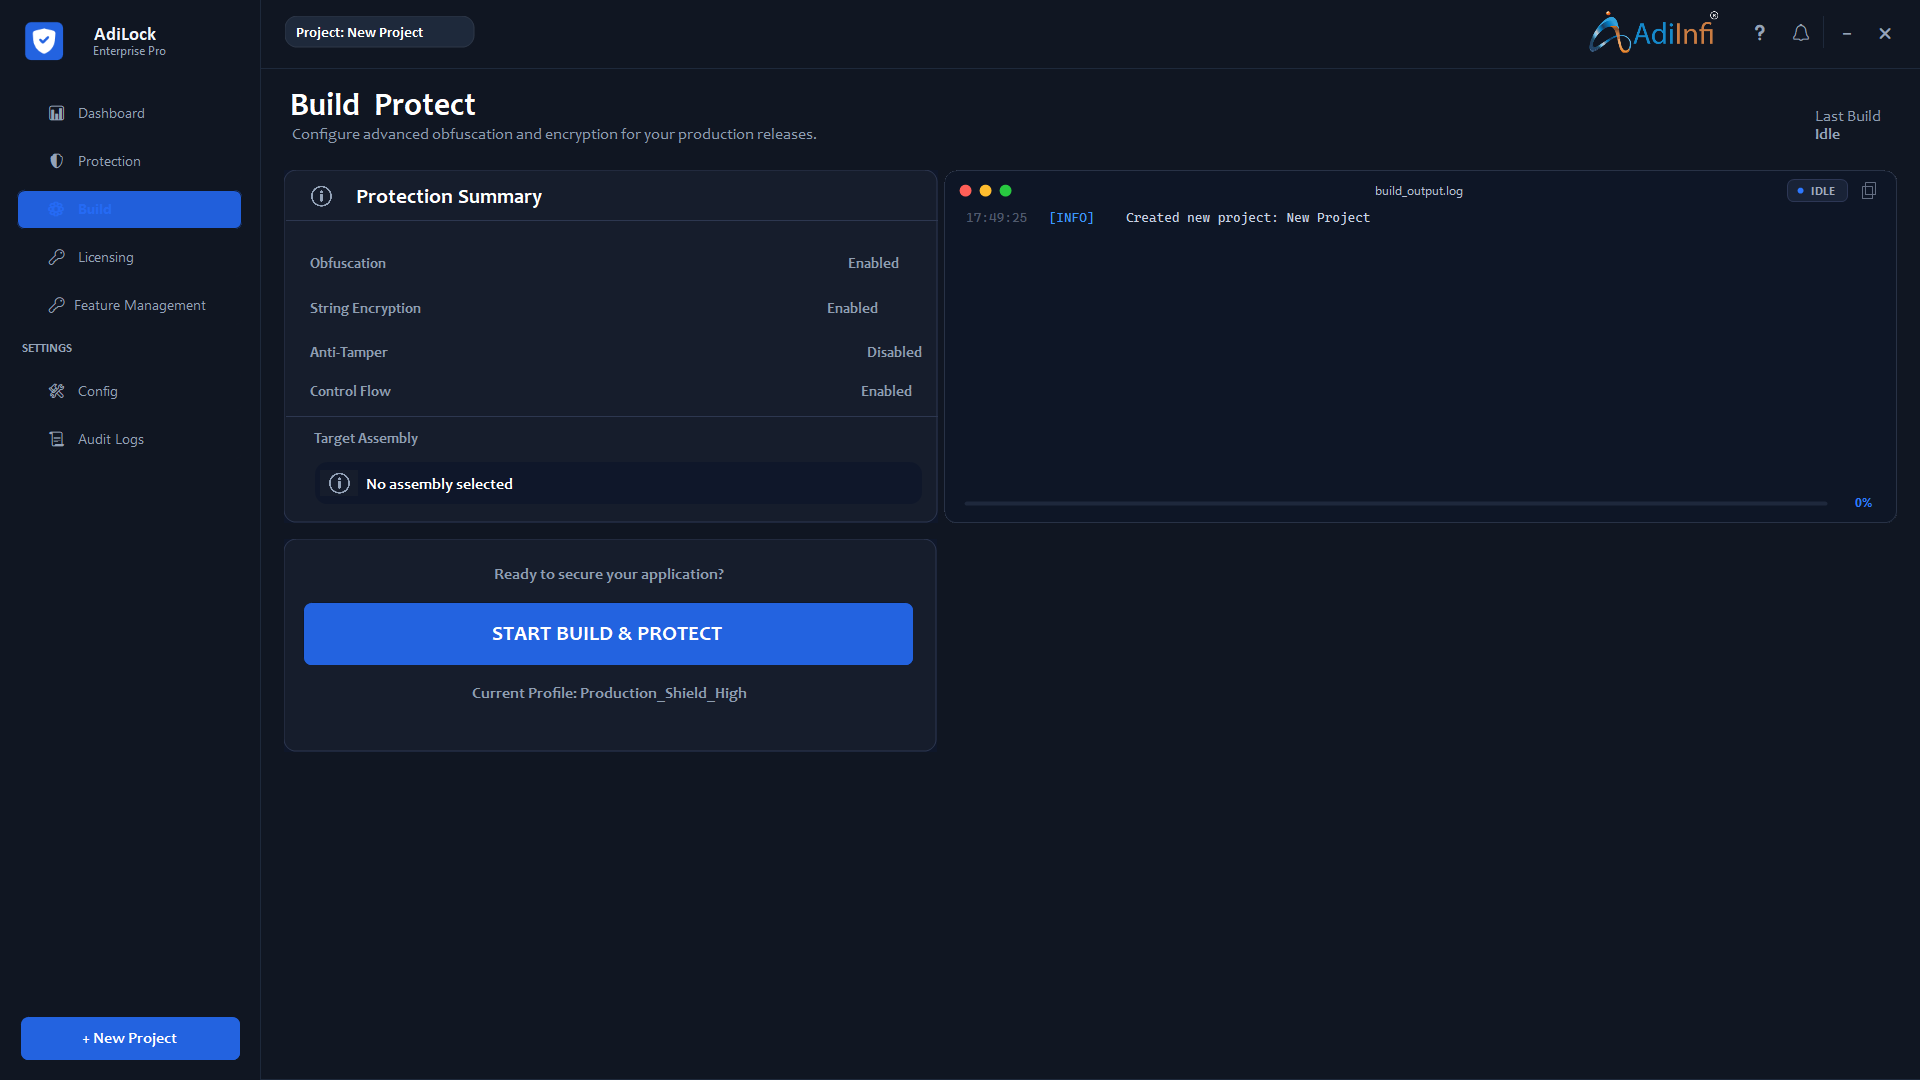
The Build view executes the protection process and gives a real-time log of every step.
Confirm the active settings match your intended release.
Click START BUILD & PROTECT.
Follow the timestamped log on the right as each step completes.
When the completion message appears, use the configured output directory.
Licensing
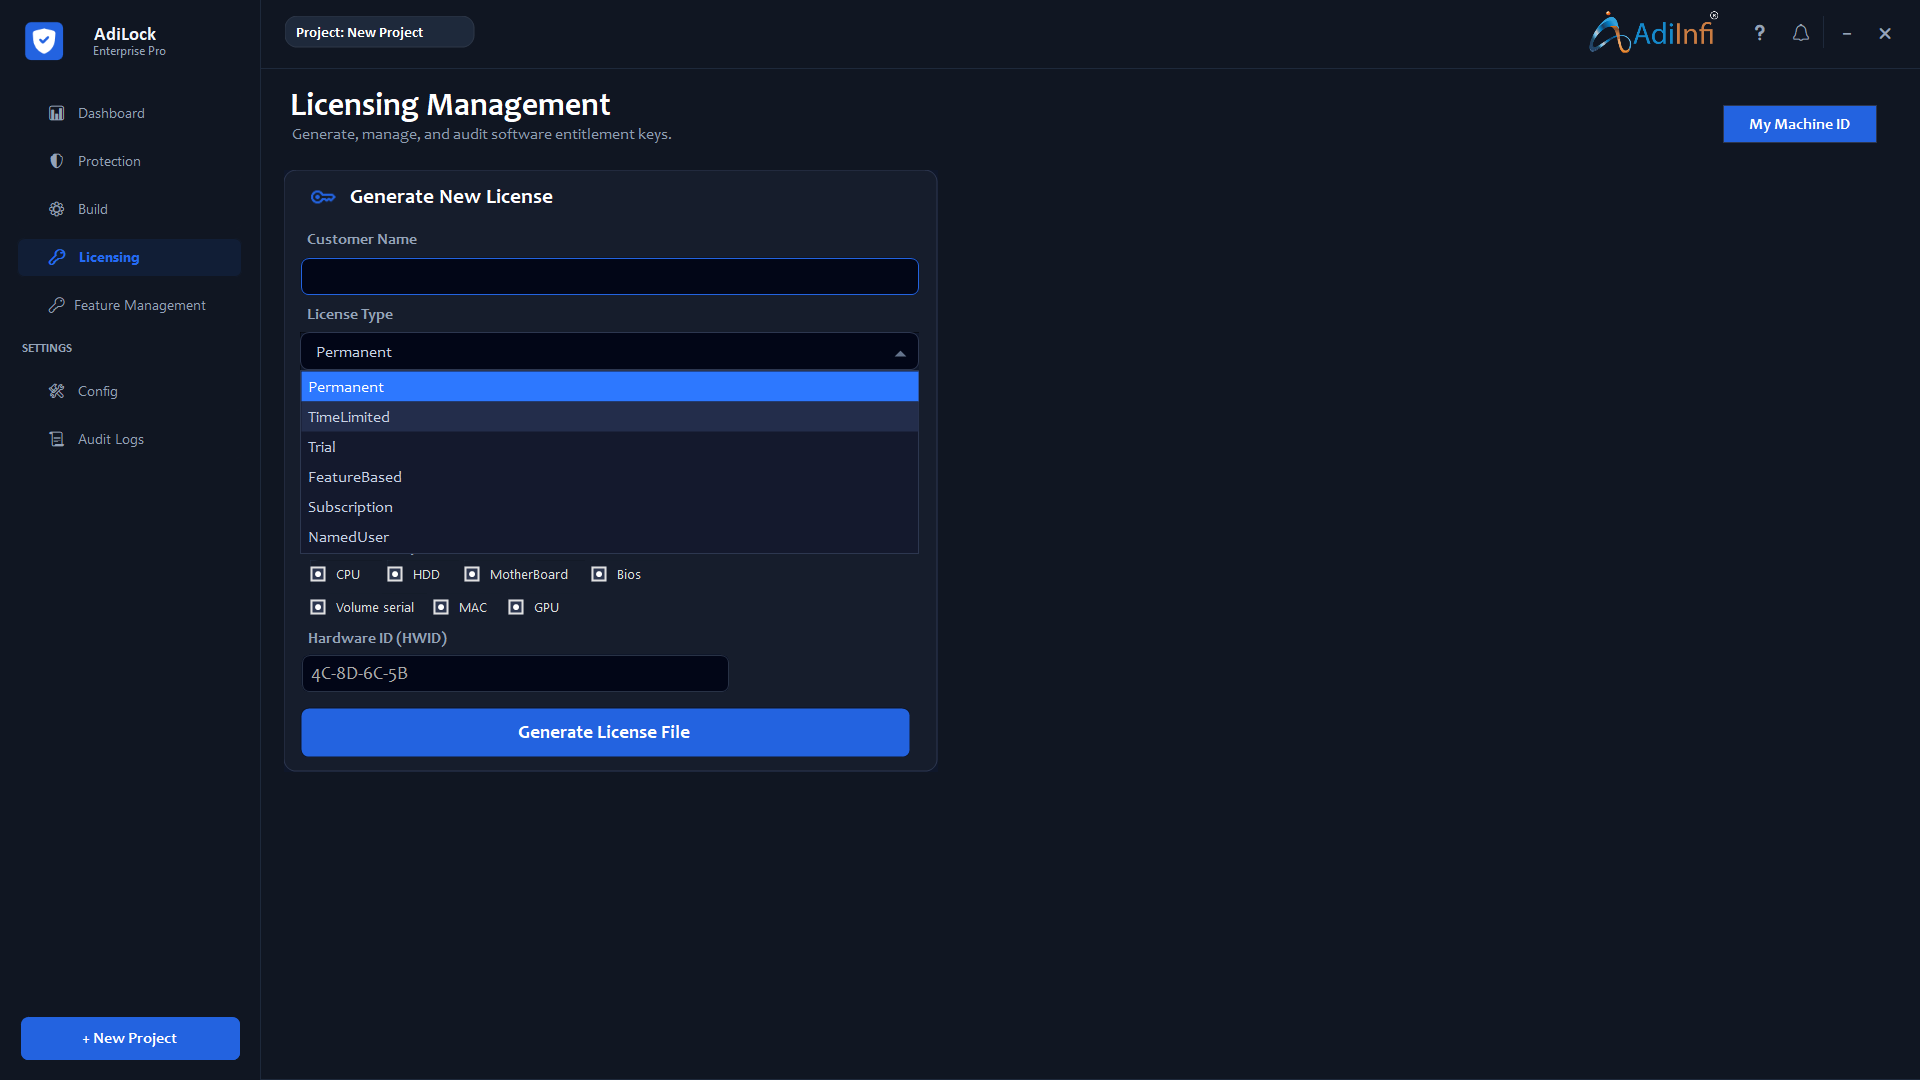
Generate signed license files for customers. Licenses can be permanent, time-limited, trial-based, or tied to specific hardware.
License Types
- Permanent: Never expires.
- Trial: Valid for a limited number of days from first activation.
- Term: Valid until a specific calendar date.
Hardware Binding
Use CPU, HDD, MotherBoard, BIOS, volume serial, MAC, and GPU selections to bind a license to a specific customer machine.
Feature Management
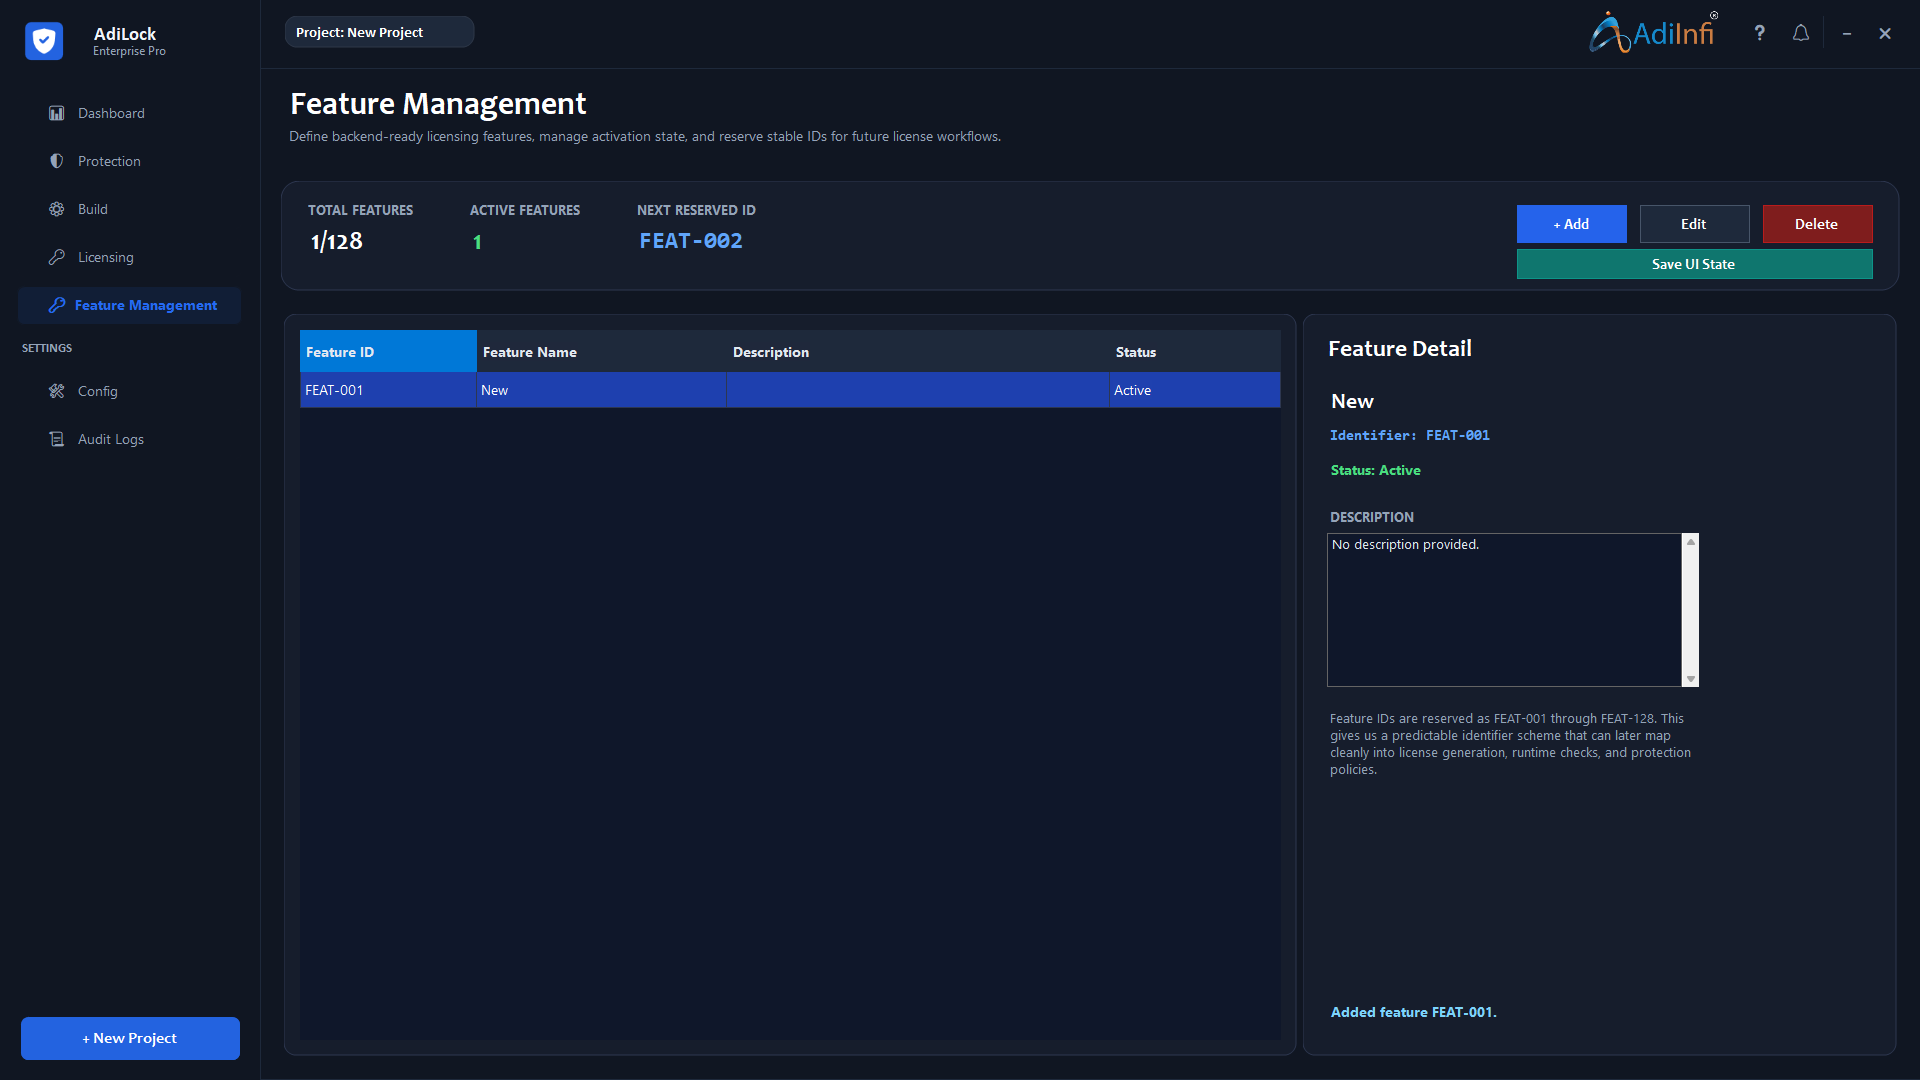
Feature Management lets you ship one protected binary and control product tiers through license-based feature flags.
Feature IDs
Every feature uses a stable reserved ID from FEAT-001 through FEAT-128, making runtime checks safe and predictable.
Adding a Feature
Click + Add, enter a feature name and optional description, mark it active if needed, then save it.
Editing & Deleting
Modify the name, description, or status from the detail panel. Delete carefully because existing licenses may rely on those definitions.
Saving UI State
Use Save UI State to persist feature definitions into the project file before closing the application.
Common Workflows
Workflow A: Protect & Release
- Create or open the project and select the primary assembly.
- Enable the desired protection layers.
- Run the build and verify the output.
- Test the protected application before distribution.
Workflow B: Issue a License
- Collect the customer hardware ID.
- Choose the appropriate license type.
- Match the hardware components used in the fingerprint.
- Generate the .lic file and deliver it to the customer.
Workflow C: Tiered Features
- Define features such as Standard, Professional, or Export.
- Check feature IDs at runtime inside your application.
- Select the licensed features during license generation.
- Deliver the correct entitlement set to each customer tier.
Troubleshooting
Common issues and practical fixes are collected here in an FAQ format.
Tips & Best Practices
Protection
- Use layered protection for better resilience.
- Reserve IL Code Encryption for sensitive modules.
- Run your full test suite against the protected build.
Licensing
- Bind high-value licenses to at least three hardware components.
- Plan a renewal grace period for term-based licensing.
- Document the exact hardware components used for each license.
Project & File Management
- Save the project file after each session.
- Keep secure, versioned backups of the .nsp file.
- Use clear project names with version numbers.
Feature Planning
- Define anticipated features early to reserve stable IDs.
- Write feature descriptions detailed enough for other team members.
Support & Contact
If you need help beyond the manual, these support channels are available.
Online Support Portal
✉ : info@adiinfi.co.in📞 : 9428362964
Account Representative
Enterprise customers can contact their dedicated account representative directly.
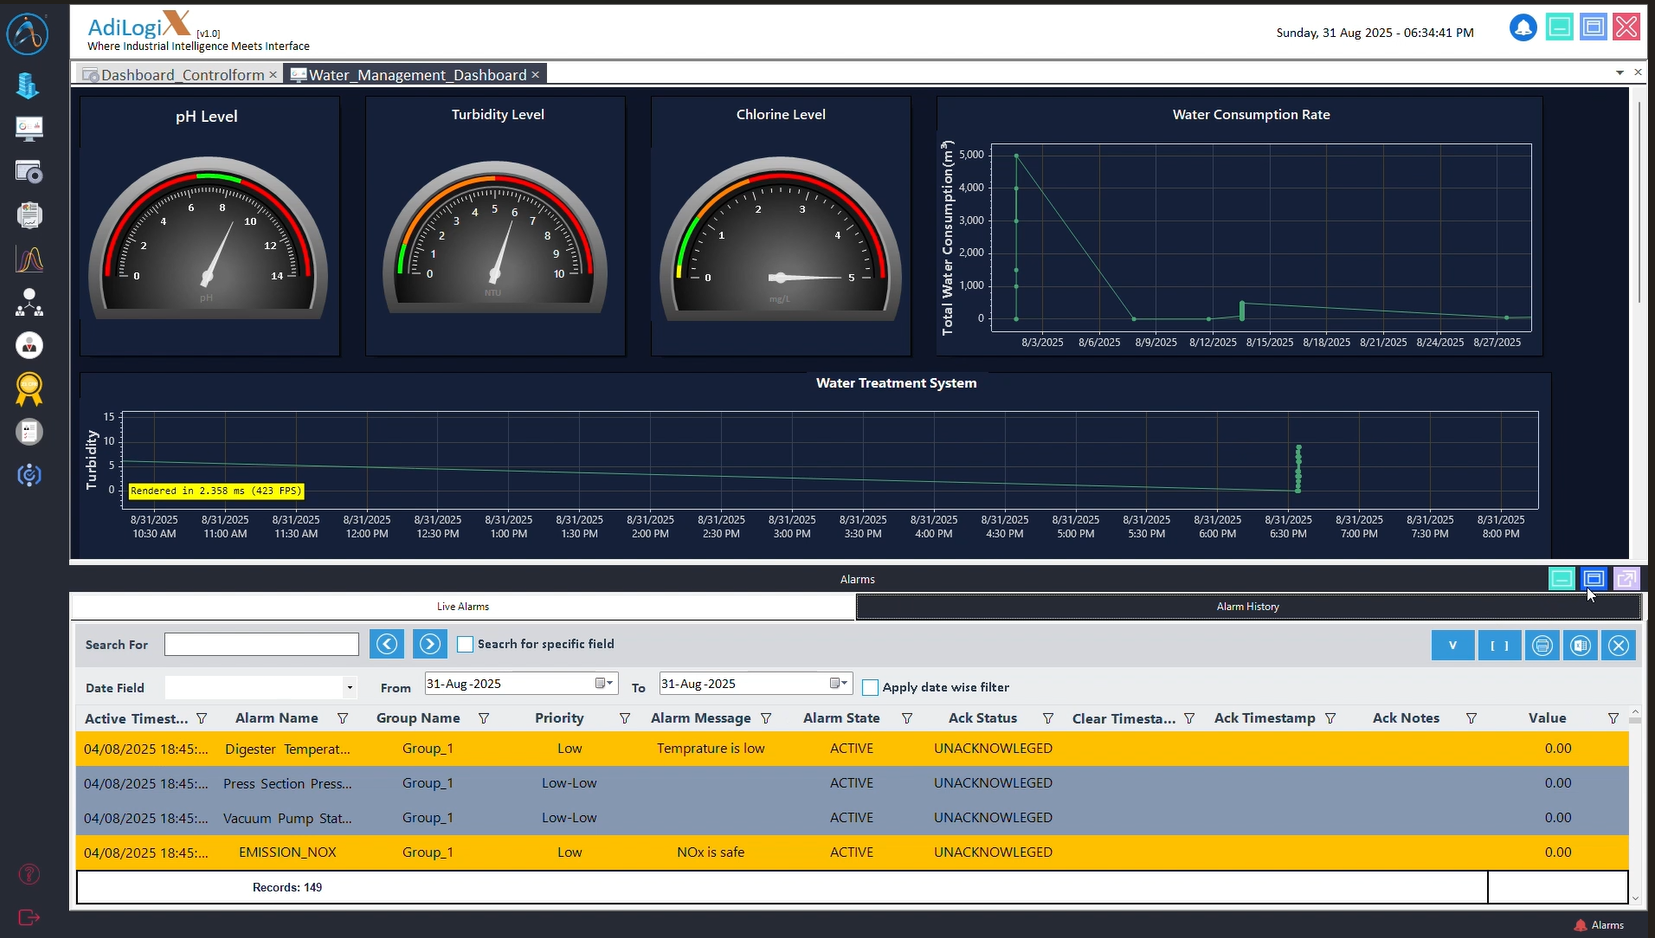
Audit Logs
The Audit Logs section in AdiLock provides a full history of builds and license generation activity.